


Install Instructions
Easy Install. Built to Last.
Your mailbox is already assembled. You'll just need to insert it into the ground and secure it with the provided screws. Follow the steps below or watch the video for a quick walkthrough.
Supplies Needed
Here's what you'll need for a smooth installation.

5 Gal Bucket + Water

Shovel / Post Digger
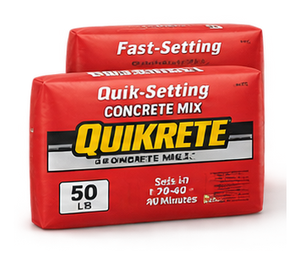
3–4 Bags of Fast Set Concrete

1 Bag Decorative Rocks (Optional)

Drill
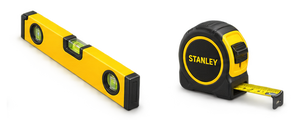
Level + Tape Measure

Trash Bags

Microfiber Cloth
Installation Steps
Follow these simple steps for a secure and lasting install.

Mark the location
Mark a spot 6–8 inches back from the curb where your mailbox will be installed. This keeps it USPS-compliant.
Door should face the road for carrier access.

Attach the post
Place the mailbox base upside down. Attach the provided post to the bottom of the mailbox with the provided screws. (Some bases have the post already attached.)

Dig the post hole
Dig the post hole the same depth as the post (~18–24" deep) and 6" wide.
USPS: the bottom of the mailbox should sit 41–45" above the road surface — check your depth.

Optional rock bed
Also dig a rectangle or circle 5" all the way around the base and 2" deep (for rocks later).

Set the mailbox
Place the mailbox post into the hole, ensuring the base sits approximately 1 inch below ground level.
Tip: If you ordered a rock bed border, position it around the base first.

Pour the concrete
Pour concrete into the hole and around the mailbox base. Concrete should be slightly below the ground line and go up the base about ½ – 1 inch.

Level Mailbox
Use a level to check both top and sides.
Adjust if needed before concrete sets.

Add decorative rocks
Pour decorative rocks of your choice around the base. 1 bag should work, use 2 if you make a larger rock bed.
Have LED numbers? Checkout power options below
Prefer to watch?
Watch the full install from start to finish.
Permit Notice
In most areas, installing a mailbox does not require a permit. However, local requirements can vary based on your city, county, or homeowners' association (HOA).
It is the homeowner's responsibility to confirm whether any permits, approvals, or setback requirements apply before installation.
Dream Mailboxes is not responsible for permit compliance or any issues resulting from local regulations. When in doubt, we recommend reaching out to your local building department or HOA before moving forward.
LED Upgrade
Illuminate Your Address
Add LED backlit numbers to make your address visible day and night. Choose between solar-powered or hardwired options.

- Direct connection to 120V power
- Use existing landscape power
- Consistent power, no charging needed
- Professional installation recommended

- No wiring required
- Solar panel charges during the day
- Automatic dusk-to-dawn operation
- Easy DIY installation
PREMIUM 316 STAINLESS
Solid stainless steel construction — no plastic housings
Bright & Efficient
Energy-efficient LEDs built to last
WEATHER RESISTANT
Designed for year-round outdoor use
DUSK-TO-DAWN
Automatically illuminates at night with solar panel or upgraded transformer
Questions about LED upgrades?
Call or text us at (561) 608-0301