


Install Instructions
Easy Install. Built to Last.
Select your mailbox type below for the matching supplies and installation steps.
Choose your install type
For mailboxes installed with a single in-ground post.
For the Aluma Modern mailbox with two mounting posts.
For installing your Vaultbox in a new concrete footer. Keep the bottom of the Vaultbox above ground level.
For the Faux Stone Pillar mailbox.
Supplies Needed
Here's what you'll need for a smooth installation.
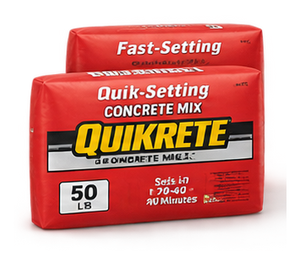
2–3 Bags of Fast Set Concrete
5–8 Bags of Fast Set Concrete
4–5 Bags of Fast Set Concrete

5 Gal Bucket + Water

Shovel / Post Digger
3–4 Bags of Fast Set Concrete

1-2 Bags Decorative Rocks (Optional)
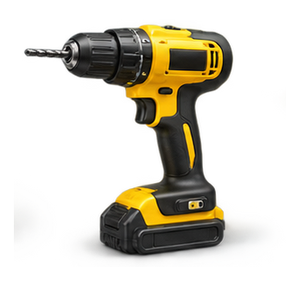
Drill
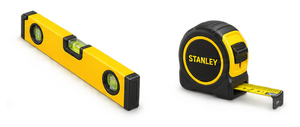
Level + Tape Measure
Trash Bags

Microfiber Cloth
Hammer drill + 1/2" masonry bit
Provided concrete anchors (or Tapcons + washers)
Installation Steps
Follow these simple steps for a secure and lasting install.

Mark the location
Mark a spot 6–8 inches back from the curb where your mailbox will be installed. This keeps it USPS-compliant.
Door should face the road for carrier access.

Attach the post
Place the mailbox base upside down. Attach the provided post to the bottom of the mailbox with the provided screws. (Some bases have the post already attached.)

Dig the post hole
Dig the post hole the same depth as the post (~18–24" deep) and 6" wide.
USPS: the bottom of the mailbox should sit 41–45" above the road surface — check your depth.

Optional rock bed
Also dig a rectangle or circle 5" all the way around the base and 2" deep (for rocks later).

Set the mailbox
Place the mailbox post into the hole, ensuring the base sits approximately 1 inch below ground level.
Tip: If you ordered a rock bed border, position it around the base first.

Pour the concrete
Pour concrete into the hole and around the mailbox base. Concrete should be slightly below the ground line and go up the base about ½ – 1 inch.

Level Mailbox
Use a level to check both top and sides.
Adjust if needed before concrete sets.

Add decorative rocks
Pour decorative rocks of your choice around the base. 1 bag should work, use 2 if you make a larger rock bed.
Have LED numbers? Checkout power options below

Mark the location
Position the mailbox 6–8 inches back from the curb, with the door facing the street.

Dig two post holes
Measure the spacing between the two posts. Dig two holes approximately 6 inches wide and 8–12 inches deep, matching the length of the posts.

Prepare the rock bed
Dig a rectangle approximately 16 × 26 inches around the base, about 2 inches deep, for decorative rocks or the included rock bed.

Set the mailbox
If included, place the rock bed border in the rectangle first. Lower both posts into the holes, with the base approximately 1 inch below ground level.

Pour the concrete
Pour concrete into the post holes and around the mailbox base. Keep concrete slightly below ground level, extending approximately ½–1 inch up the base. Leave room for decorative rocks.

Level the mailbox
Check the top and sides with a level. Adjust before the concrete sets and allow it to cure according to the concrete manufacturer's instructions.

Finish and turn on the lights
Add decorative rocks around the base. If fitted with solar lights, turn on the switch underneath each light and select Warm, Neutral, or Cool White. Position the mailbox where the solar lights receive direct sunlight.
Wipe the mailbox as needed with a microfiber cloth and ZEP or Sheila Shine, following the cleaner’s label instructions.

Mark the location
Mark the position 6–8 inches back from the curb to the front of the mailbox frame.

Prepare the concrete footer
Use standard 2 × 4 lumber to build a footer frame at 30"x30" minimum. Or Use rock bed if included with your order (36"x36"). Excavate the ground inside the frame approximately 4–6 inches deep, with the bottom of the frame at ground level.

Position the Vaultbox
Place the Vaultbox in the center of the frame. Its bottom should sit approximately 2 inches above ground level, about halfway up the frame.
Do not allow the Vaultbox to sit below ground level.

Insert the anchors and level
Insert the provided concrete anchors through the four holes in the bottom of the Vaultbox. Check that the Vaultbox is level before pouring concrete.

Pour the concrete
Pour concrete on all sides so it fills the entire base. The concrete should extend approximately ½ inch above the bottom of the Vaultbox. Optional rebar can be added during this step.
Keep the LED wire out of the concrete.

Allow the concrete to cure
Follow the concrete manufacturer's curing instructions. Remove the footer frame afterward if desired.

Finish the landscaping
Place decorative rocks along the sides. Keep rocks clear of the rear door and check that it opens fully. Replace any grass or landscaping removed around the frame.
LED numbers require the correct transformer or compatible solar supply. Never connect the mailbox LEDs directly to standard 120V power.
Choose the location
Position the front of the Vaultbox frame 6–8 inches behind the curb. Allow clearance for all doors to open.
The Vaultbox base is 26" x 25"

Prepare a smooth, level slab
Pour a concrete slab at least 30" × 30" and 5–6" thick. Finish the surface smooth and level. Allow it to fully cure according to the concrete manufacturer before drilling. If using an existing pad or sidewalk, confirm it meets these dimensions and thickness requirements and is sound and level.
The Vaultbox base is 26" x 25" so you can make the concrete pad larger if you prefer

Position the Vaultbox
Place the Vaultbox on the cured concrete pad. Check that it is level and all doors open freely. Locate the four mounting holes in the base and mark their positions on the concrete.

Drill the concrete
Move the Vaultbox aside and drill the marked holes with a hammer drill and 1/2" masonry bit for the provided anchors. Follow the anchor instructions for hole depth, cleaning and required distance from concrete edges. If using Tapcons, use the bit size specified for those screws.

Secure the Vaultbox
Clear drilling dust from the holes. Reposition the Vaultbox and secure it through all four base mounting holes using the provided concrete anchors. Tighten according to the anchor instructions, then check stability and door operation.
Alternative: use suitable Tapcon concrete screws with washers, following the screw manufacturer's installation requirements.

Position and dig
Position the front of the mailbox opening 6–8 inches behind the curb. Dig an area approximately 25 × 25 inches and 6 inches deep. Adjust for uneven ground.

Set the pillar
Place the pillar in the center of the hole with the mailbox facing the street.

Level the mailbox
Check front-to-back and side-to-side. Adjust the pillar until it is level.

Pour the concrete
Pour 3–4 bags of fast-set concrete around the pillar. Slope the concrete away from the pillar for drainage. Follow the concrete manufacturer's curing instructions.

Add rocks and clean
Add decorative rocks around the base and clean the mailbox with a microfiber cloth.

Connect the solar panel
If ordered with solar power, attach the solar panel to the base using the provided screws and plug it in.
For landscape power or a transformer, follow the separate electrical instructions. Consult a licensed electrician for new wiring, outlets, or circuit modifications.
Detailed instructions for this model are coming soon. Call or text (561) 608-0301 and we’ll walk you through it.
Prefer to watch?
Watch the full install from start to finish.
Prefer to watch?
Watch the full install from start to finish.
Prefer to watch?
Watch the full install from start to finish.
Permit Notice
In most areas, installing a mailbox does not require a permit. However, local requirements can vary based on your city, county, or homeowners' association (HOA).
It is the homeowner's responsibility to confirm whether any permits, approvals, or setback requirements apply before installation.
Dream Mailboxes is not responsible for permit compliance or any issues resulting from local regulations. When in doubt, we recommend reaching out to your local building department or HOA before moving forward.
LED Upgrade
Illuminate Your Address
Add LED backlit numbers to make your address visible day and night. Choose between solar-powered or hardwired options.

- Connect LEDs through the correct low-voltage DC transformer
- Use landscape power only when its output matches your LEDs
- Never connect LED numbers directly to 120V power
- Professional installation recommended

- No wiring required
- Solar panel charges during the day
- Automatic dusk-to-dawn operation
- Easy DIY installation
PREMIUM 316 STAINLESS
Solid stainless steel construction — no plastic housings
Bright & Efficient
Energy-efficient LEDs built to last
WEATHER RESISTANT
Designed for year-round outdoor use
DUSK-TO-DAWN
Automatically illuminates at night with solar panel or upgraded transformer
Questions about LED upgrades?
Call or text us at (561) 608-0301